
Year 4 have a great ‘Charlie and the Chocolate Factory’ display. It takes up half of their practical area and welcomes visitors in with a variety of 3D objects and things to do. All it lacks is sound, which gave me an idea…
What if I could make a machine that would play a ‘random’ sound effect or quotation from the book / film(s) when someone entered the area. This is easy to do in Scratch but I’d need some kind of sensor to activate the script and would need a device to run it.
We’ve got some Raspberry Pies (Pis?) kicking around that are somewhat under-used so I wondered if I could use one of those. My idea was to use the Pi to run the program ‘headless’, that is to say without a monitor, keyboard or mouse. The sensor could be a Lego WeDo ‘distance’ sensor which simply plugs into a Lego hub which itself plugs into the Pi’s USB port – so no need to mess around with breakout boards etc. It took a bit of working out how to make this work ‘in the field’, as it were, so I thought I’d document the process in case anyone else would like to try it out. Here goes…
- I downloaded and installed the latest Raspian build onto the Pi using the ‘Noobs’ route. See here.
- I grabbed a load of sound effects from the internet and used Audacity to turn them into AIFF files. I tried WAVs first but the Pi had difficulty with them.
- I imported the sound effects and renamed them as the numbers 1 to 19
- I plugged in the Lego sensor and wrote the following program…

- The program activates a random sound effect if someone comes within the range of the sensor. This is about 10cm so you have to think carefully about where to place it.
- Now came the tricky bit – how to make it run by just plugging it in and switching it on, without a keyboard, mouse or monitor. I must admit it took a bit of research and experimentation to get it to work but, in the end, this was the easiest way to achieve it… To work, you need to edit the /etc/profile file on the Pi. In laymen’s terms, it’s a file called ‘profile’ in a folder called ‘etc’ which is, itself, in the root directory of the Pi. If you click on the file manager in a Pi it defaults to your ‘home’ folder, so to get to the root, keep pressing the ‘up one directory’ button until you find ‘etc’.
- Once you’ve found the ‘profile’ file you’ll need to open it as administrator in order to edit it. To do that, go to the ‘terminal’ and type sudo leafpad. This will open the Leafpad text editor in admin mode.
- Then, drag and drop the ‘profile’ file onto the open Leafpad window. If this doesn’t work, just go to ‘file / open’ in Leafpad and load it from there.
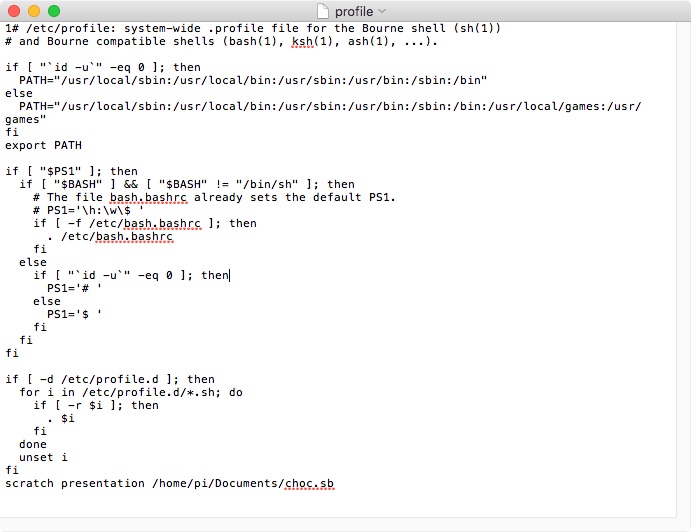
- Once the ‘profile’ has loaded, add the line: scratch presentation /home/pi/Documents/whateveryourprogramiscalled.sb to the end to load your Scratch program and make it auto-run. Mine was called ‘choc.sb’ and was stored in the ‘Document’ folder but yours might be elsewhere. ‘Presentation’ mode (in the command) has the effect of running the program at full screen and activating the ‘green flag’ to run it. The former wasn’t important to me, but the latter was. Here’s the finished ‘profile’ file with the line added…
- Save the file
- If your program is controlling audio, as mine was, you might need to make sure that audio is set to ‘analog’ so you can plug in speakers. To do this, find the relevant setting by going to terminal again and typing sudo raspi-config. You might also need to use this to set the Pi to auto login and run the GUI rarther than command line, if it doesn’t already. Settings are relatively easy to find but, if you’re stuck, let me know.
That’s it! Now unplug the Pi, move it to it’s destination. Leave the Lego hub and distance sensor plugged in, plug in some speakers and off you go!